Eight Steps to Dry Shipping Container – Without Power
Contributing Variables and Remedies for Eliminating Condensation
The following is prioritized by the biggest bang for the buck. Please note; every location and climate zone will be a little different. In the hot humid locations it can be pretty tough controlling condensation without power.
The following 6 steps are mandatory- the basic starting point
- Container must be placed on good draining ground, not in a low wet area
- Exposure to wind, in a sunny area, but a shaded roof can be very beneficial (sounds a little conflicting).
- A min. separation of 1ft. from neighboring buildings or other Conex, for airflow (drying) purposes
- Never place container directly on the ground, always on a beam at each end, allowing airflow underneath
- The roof must be kept clear of leaves, soil, algae, moss, etc. Regular maintenance required in some areas.
- If rusted or a dark color, paint white (gloss), especially the roof to reflect the heating effects of the sun. Good reports on this silicone roof paint: GacoFlex s2100 gaco.com/product-details/gacoflex-s2100/
- Ventilation is the next step: $150 – $525: Install proper ventilation that will encourage multiple air exchanges per day. Some locations will need more airflow then others. Three choices: A powered fan system, spinning rooftop turbine, or our “360 Wall Mount” exhaust vent. The air must be driven; louvers and other passive products do not create airflow. See “Ventilation Requirements” below.
- If condensation persists Insulation is the next option: Closed cell spray insulation is the most effective because it fills all air pockets and also works as a vapor barrier: We have seen extremely low RH in containers with just the ceiling done. In the real tough situations the walls might also have to be sprayed. ½” – ¾” appears sufficient. There are companies that will spray it (over $1000), or there are “Do it Your Self Products” ($300-$600).
If all else fails you might need a roof structure, or bring in power. The roof (peaked or lean-to) will keep the sun off as well as dew and rain. The overhang will keep water from the sides and saturating the Conex base. In the hot humid areas like Florida a dehumidifier would be the last but effective option. In the cooler locations a heater might be required.
Important Tips
- Avoid bringing wet materials or equipment into the container, same goes with wet shoes when entering. The extra moisture could be sufficient to initiate condensation, only adding to the work load of the above advantages.
- A full container often has fewer problems than an empty one. Displacement reduces the interior air volume, which in turn reduces the interior moisture content.
- The best method of monitoring the interior atmosphere is with a humidity gauge. We have been using the small digital units, located about half way up a wall. You don’t want to go in every day to check (especially with wet shoes), but it is the best way to monitor the RH and to see the results of your moisture control efforts.
Note: All the points listed here will offer your Conex the best possible chance of being condensation free. Depending on the severity of the containers moisture problem you might require insulation, more vents or even a roof. Interior conditions will vary depending on climate, geographical conditions and seasons.
Ventilation Requirements
Stock Container Vents: Are usually mounted on the upper side walls, 4 – 8 units per container. They are as passive as you get, worse still, they only have an air passage way of 3/8 sq. inch – about the size of a dime. Proper ventilation needs a driving force with direction and to provide sufficient air exchanges for the size of the enclosure. Our passive intake vent below has about 60 times the airflow capacity of these stock vents.


Airflow Direction and Drive: The overall goal is to pull air from one end thru to the other where it’s exhausted. An open port concept that lets the wind blow in is not ideal. Air borne particles including mist, moisture, pollen, ash, etc., will be blown inside. Fans are used to exhaust, pushing out air from one end, same as our “360 Wall Vent”. Most places have sufficient winds to drive a good exhaust. See the following site for winds in your area. wunderground.com/history The spinning turbines are good exhaust units, but the installations are complex due to having to seal on the corrugated metal roof. They are mechanically dependent and are known for allowing water and insects inside.
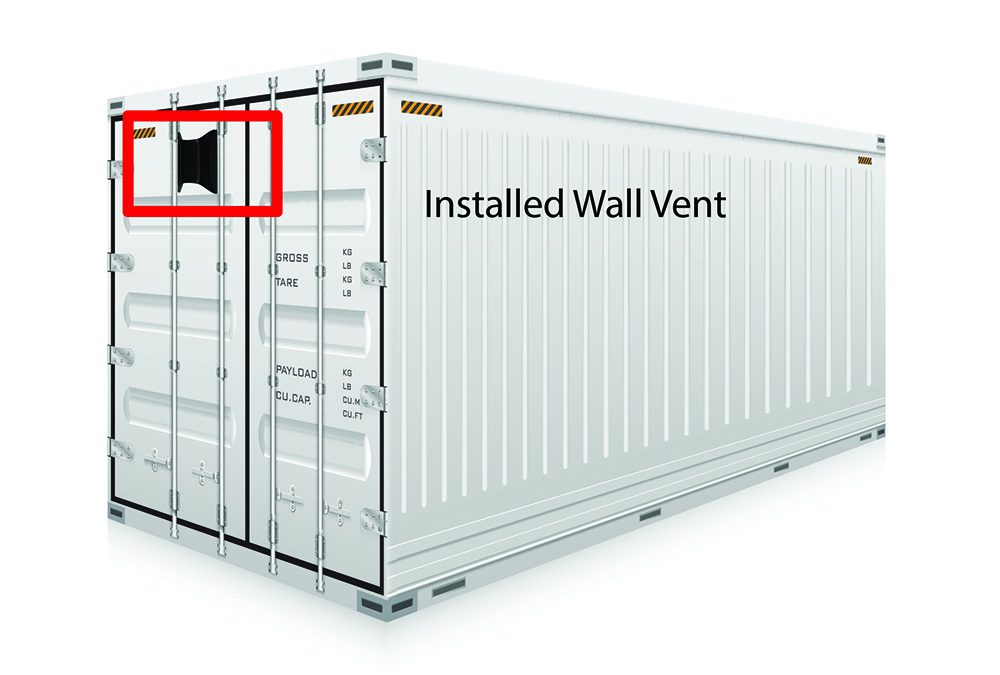
Exhaust Vent “360 Wall Vent” – Drives the Airflow: An easy install, with no moving parts, a bug screen, water proof and exhausts 3-4 Cu Ft / min with every 1 mph of wind. The patented vent cover manages all winds, any direction, turbulence, gusts and can still exhaust with air movement as low as ½ mph. To take best advantage of your local winds, vent location is important. To allow vent installation on any of the four walls we have adapter plates to insure the best location for the exhaust vent is always possible. See Container Ventilation Design.


Our “Intake Vent” A Passive Vent Designed for Containers: Fits almost anywhere on a container, for both, the less windy side and shady side. Two styles; one for the side wall profile and another one for the back end.

